Archive

Recipes

you know how they say that winter is all about nesting? how we all gain those extra 5-10 pounds courtesy of meat sauces and carbs and other such comfort foods? well, while i definitely gained my “winter weight”, i haven’t exactly been nesting. or, maybe i’ve been nesting, but i haven’t been cooking nearly as much as i did last winter. i got this amazing giant dutch oven from sur la table for hanukkah, and i’ve used it once. ONCE! that is a travesty.

i’m not sure what got into me this winter. i could use the easy excuse and say i was too busy for heavy duty cooking, but i think the true reality is that i just got lazy. but suffice it to say, my kitchen has not been seeing enough action (you and me both, kitchen), and it’s time to whip my ass back into shape.

this weekend marked the first time that it actually felt like spring here in new york, and i celebrated it with a stroll through the union square greenmarket on saturday afternoon. i only came home with flowers – the best of the produce isn’t out yet – but as i walked through, i was reminded of just how much i love picking up a bunch of fresh vegetables and herbs, coming home, and making magic out of them. spring is one of my favorite cooking seasons – hellooo, sugar snap peas and asparagus – so it’s high time that i get my booty in gear.

as a little inspiration, here are 5 easy weeknight meals i’m vowing to whip up over the next 2 weeks. first up is tonight’s meal: easy weeknight chicken tacos. YES PLEASE.

2bcba94c0e94e7e75cafda7e50fff2de

other recipes i’m dying to try:

this rigatoni with asparagus pesto and ricotta salata (i heart pesto)

908317f98f29aeff86bc987703fad843

this roasted harissa salmon with lemon couscous

56ff06c5264f0f4c966cd45d2ee20dec

this slow cooker healthy chicken tikka masala (i am forever on a quest to make good tikka masala)

NOTE: slow cookers aren’t exactly quick, but they are easy. pile the stuff in before you leave for work, come home, and voila! dinner is served. 

a3eb933490286358e4328c1014e699be

and last but not least, this creamy corn chowder. i LOVE corn chowder, but never thought to blend it. genius!

c19fef35026a18e4e0b13d13b38d2ea8

levain chocolate chip cookiesi think it’s pretty sacrilege to admit this, as a cookie lover, but i have never actually had a levain bakery chocolate chip cookie. i’ve seen them on numerous instagram snaps, heard about them ten times over, but i’ve never actually eaten one myself.

which is why it might seem ridiculous that i set out to recreate them on sunday afternoon – how could i recreate something i’ve never eaten? my line of thinking goes like this: what’s so special about the levain cookies is that they are ENORMOUS (6 oz of dough a piece, they weigh them before baking!); crisp on the outside and chewy on the inside. and also, i’m pretty sure that my chocolate chip cookie recipe is one of the best i’ve tried (and i’ve tried many). why fix what ain’t broken? why not just use my own recipe, with a few tweaks, to make a doughier (more flour), larger (more dough), chocolate-ier (semi sweet chunks instead of chips) cookie?

so, that’s what i did. and while they may not taste exactly like the levain version, they look BOMB.com. and taste pretty damn good if i do say so myself. of course, they’re best hot out of the oven, so if you have to eat them the day after, reheat in the microwave and thank me later.

levain bakery’s chocolate chip cookies (my version):

what you’ll need:

  • 3 cups plus 2 tablespoons all purpose flour (I used King Arthur Unbleached AP Flour)
  • 1 teaspoon baking powder
  • ¼ teaspoon baking soda
  • 1 ½ teaspoons kosher salt
  • 1 cup unsalted butter, cold and cut into cubes ( i took mine straight out of the freezer)
  • ¾ cup + 4 teaspoons (6 ounces) light or dark brown sugar
  • ½ cup granulated sugar
  • 2 eggs, cold, lightly beaten in a separate bowl
  • 1 teaspoon vanilla extract
  • 2 cups semi sweet chocolate chunks (i got mine at trader joes)

what you’ll do: 

1. line two baking sheets with a silpat or parchment paper and set aside.

2. mix your dry ingredients (flour, baking soda, baking powder and salt) in a medium bowl, set aside.

3. in a stand mixer, beat your butter until fluffy, then add your sugar and beat until incorporated.

4. reduce your speed to medium-low and add eggs, then vanilla.

5. gradually beat in the flour mixture, and then stir in your chocolate chunks/chips.

6. divide your dough into 12 equal portions, and shape into circles. place 6 cookies on each baking sheet, and pop them in the fridge for 30 minutes (you can do this up to 12 hours before if you’d like) to chill.

7. bake at 375 for 18-22 minutes in the middle of the oven, then remove to cool. they’ll continue to cook as they cool, so don’t be afraid to take them out too ‘early’ – early is better in this case!

8. eat immediately, if possible, but you can also put them in a tupperware and reheat in the microwave when you want to eat them. they reheat well and taste oh so much better when they’re warm.

happy baking!

sunday night bologneseit’s no secret around these parts (or any parts, really) that i looove me some carbs. more specifically, pasta. as in, i’m sure i would be really really thin if i gave up pasta. i would look like a miniature version of myself. and i’d probably have b cup boobs (let’s be real, a cups are out of the question). and while both of those things would be really wonderful for my self image, they’d also make me a sad sack of a person, because honestly, WHO WANTS TO LIVE WITHOUT PASTA?!

not i. i think all those people who swear paleo food is delicious and “going gluten free” is the shit are LYING.

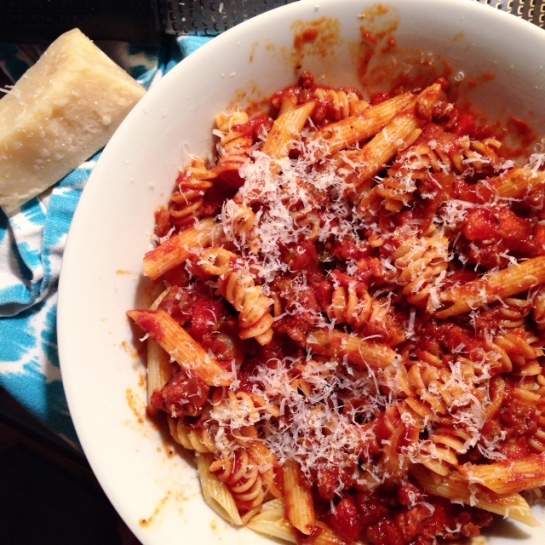
why? because there’s nothing like digging into a giant steaming bowl of pasta. pasta is an antidote to sadness, to madness, to anxiety and to stress. it’s like a hug in a ceramic bowl – and this bolognese recipe is no different. comprised from not just one but three types of meat (bacon, italian sausage, and ground sirloin), it’s sure to create a  serious ‘happy in my mouth’ moment. it also makes your home smell incredible while it simmers on the stove, and makes people think you’re an all around domestic goddess.

see? i told you i could never give up pasta.

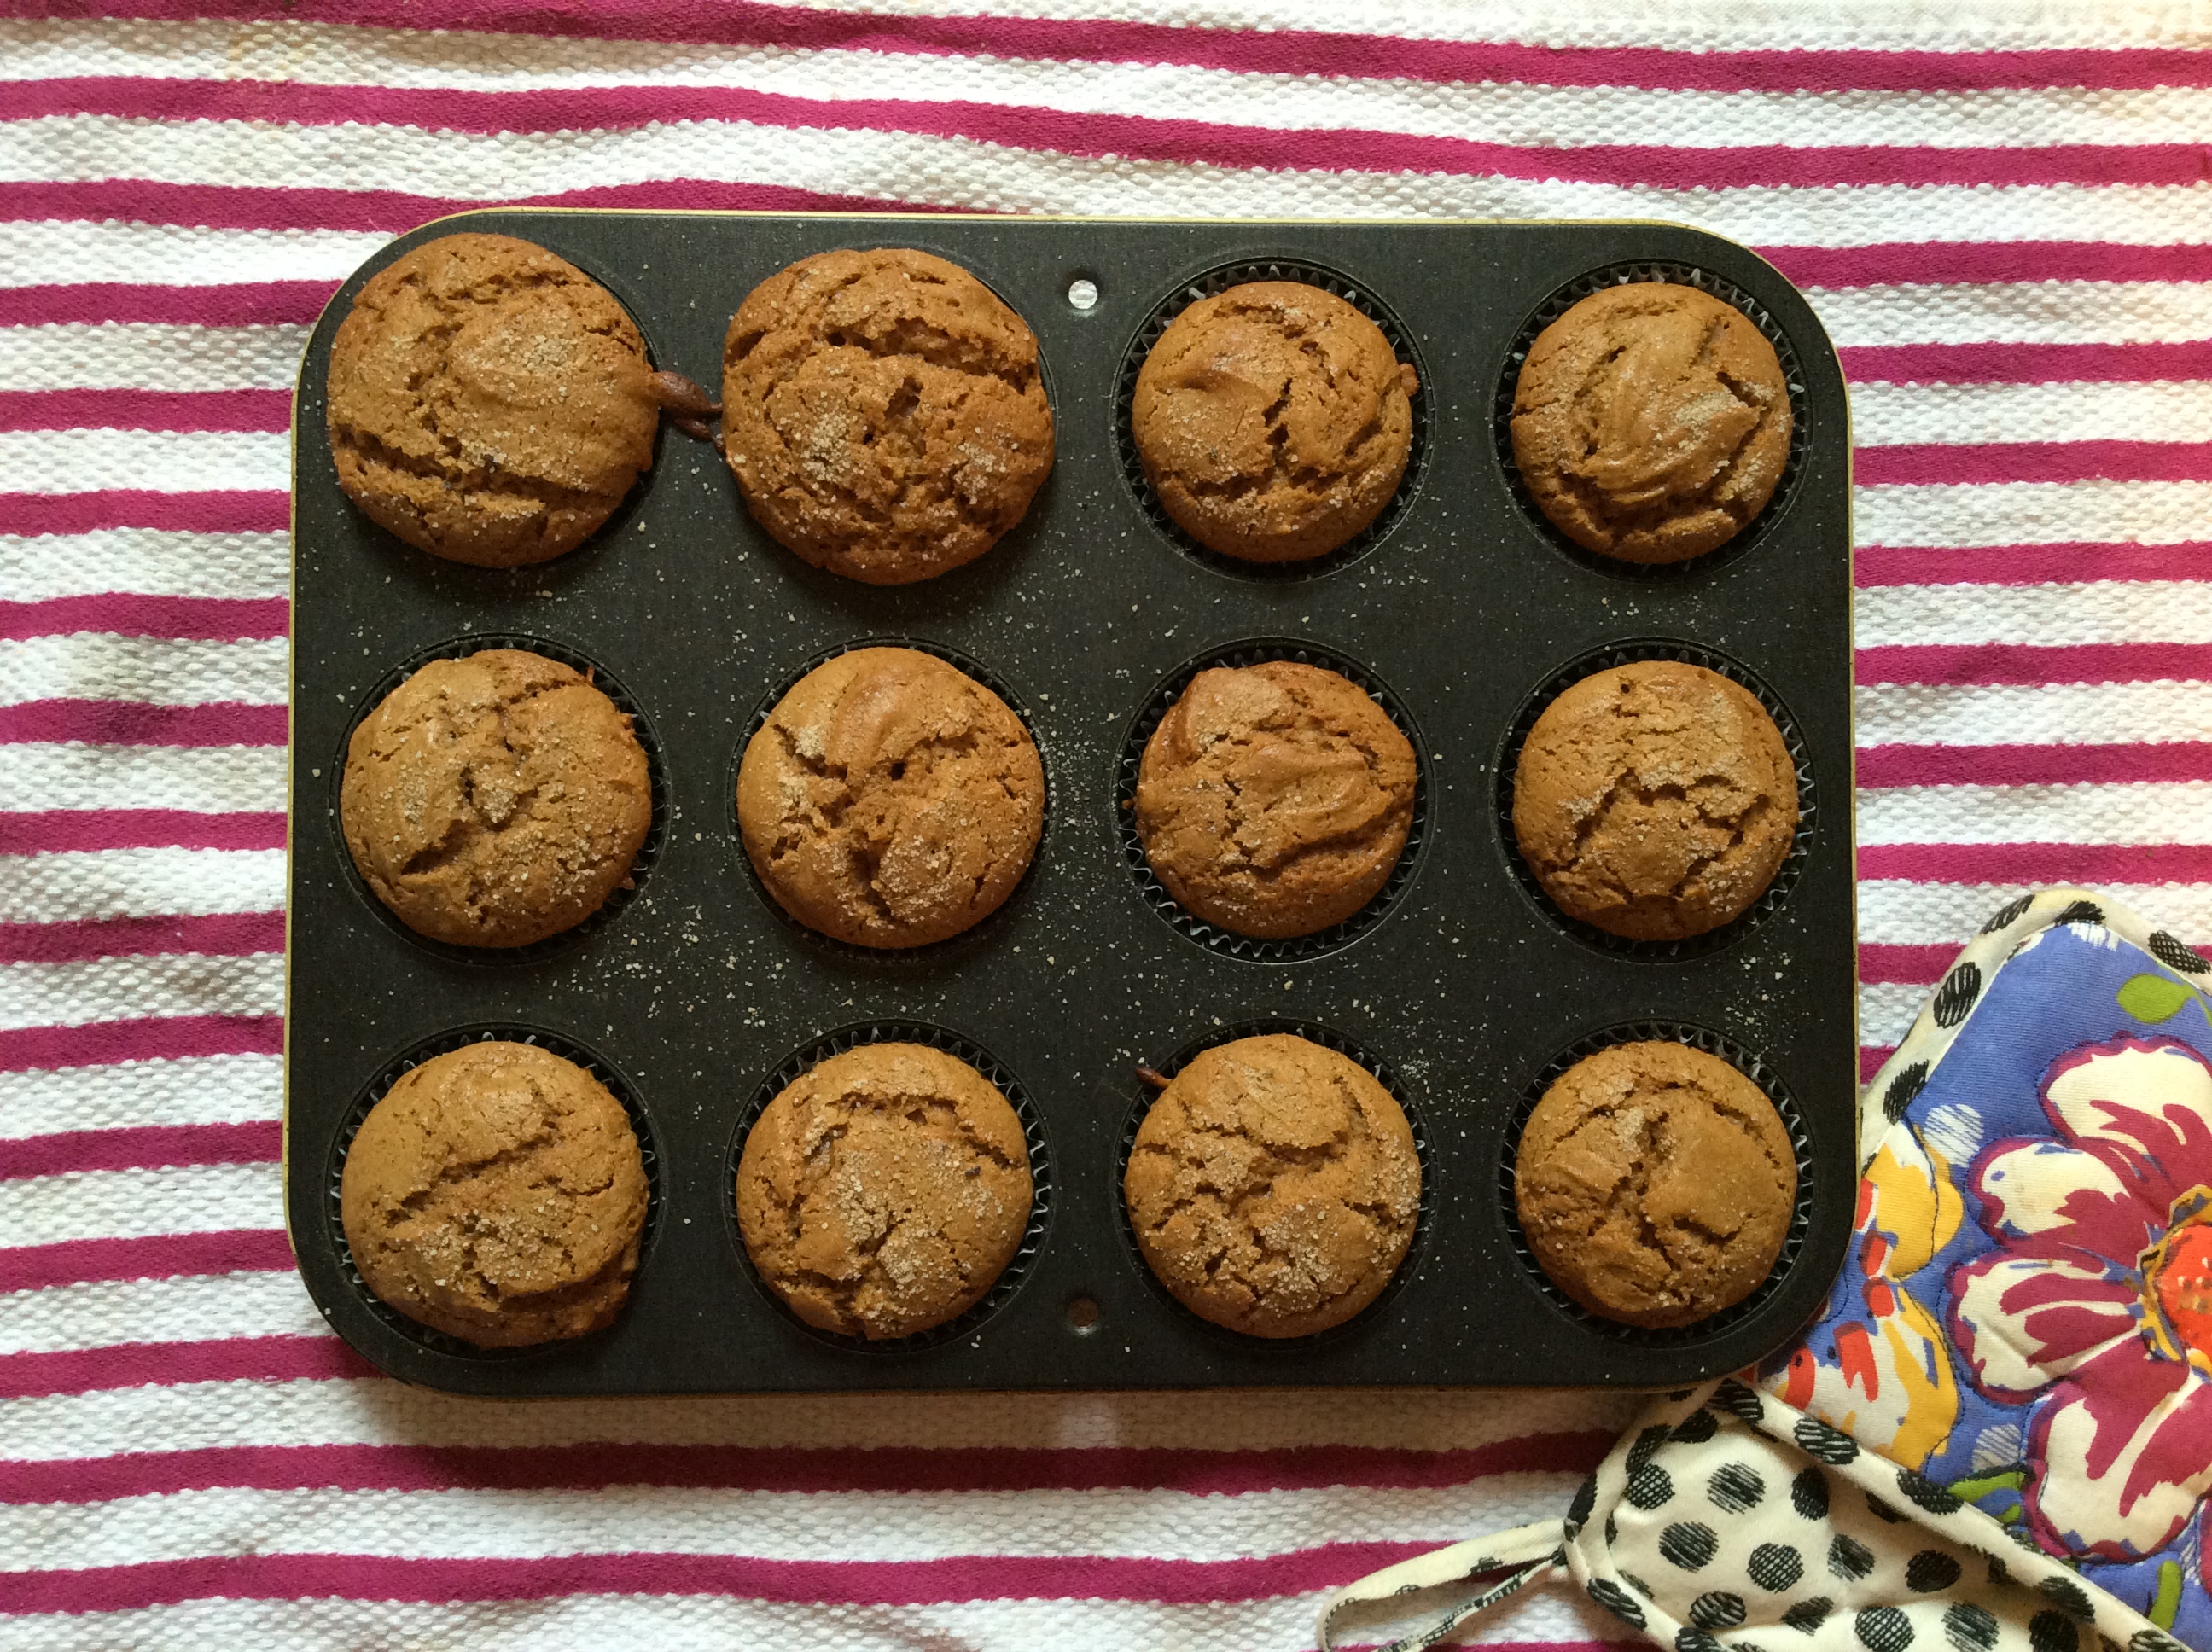
one of my favorite things to do on sunday afternoons is to wile away the hours in the kitchen. i can dice, chop, and simmer with the best of them, and there’s something almost meditative about slicing onions and chopping fresh rosemary into teeny tiny bits of flavor. this past sunday, i put on spotify’s “your favorite coffeehouse” playlist (the best, i tell you, i listen to it all day long at work) and got to work, and by 7pm, i’d taken a spin class, taken a bath, cooked this amazing meal alongside a batch of peppermint bark brownies (omg, i can’t even tell you about the goodness), and was ready to plop on my couch for an SVU marathon.

a good sunday, indeed.

so, let’s cook, shall we?

what you’ll need:

3 cloves of garlic, minced

1 medium onion, diced

2 medium stalks of celery, diced

2 medium carrots, diced

1 tbsp extra virgin olive oil

1/4 lb dry rub bacon, chopped into 1/4 pieces

1/2 lb spicy (or mild) italian pork sausage, casings removed

1/2 lb ground sirloin

4 tbsp tomato paste

1 28 oz can of tomatoes, diced or whole

1/2 cup dry white wine (sav blanc or pino grigio both work well)

1 cup low sodium chicken broth

1 tbsp black pepper

1 tbsp fresh rosemary, washed and chopped (or 1 tbsp dried)

1 tsp fresh thyme, washed and chopped

2 tbsp fresh basil, washed and chopped (or 1 tbsp dried)

2 tbsp fresh oregano, washed and chopped (or 1 tbsp dried)

2 bay leaves, dried

what you’ll do:

start by dicing your mirepoix (a fancy french word for carrots, celery and onions), as well as your garlic.

put a large pan on the stove – a dutch oven like this one is great, but you can also just use a large soup pot if you don’t have anything le creuset-like (you just need to be able to cover the pot to simmer it later on.

sauté  your mirepoix and garlic in the olive oil for about 5-7 minutes, or until soft.

add your chopped bacon and auté on medium heat 3-4 minutes, breaking up the chunks.

do the same with your sausage. then do the same with your ground sirloin – make sure it’s evenly browned (but not fully cooked).

add tomato paste, wine, chicken broth, and your 28 oz can of tomatoes* (i like chopped because i’m lazy, but whole is thought to be better – who knows why?). mix thoroughly, add salt and pepper to taste, and simmer, covered, for about 15-20 minutes. things are going to start to smell realllly good.

add your herbs: basil, oregano, rosemary, thyme, bay leaves, etc. you can really throw in any herbs you’ve got laying around – they’ll add more flavor; it’s hard to go wrong. i love thyme and rosemary, so i always use those, and bay leaves are sort of like a magical ingredient. you put ’em in, simmer, take ’em out, and VOILA, flavor blast.

simmer an additional 10 minutes. remove bay leaves.

at this point, you’re ready to serve – but the longer you simmer this stuff, the better, so long as you do so on really low heat. i let my sauce simmer for about 45 extra minutes, and let’s just say, it didn’t do the bolognese any harm.

when you’re ready to dine, serve over pasta (i love penne or rigatoni to catch all the meaty bits, but spaghetti would look nice too), and grate fresh parmesan cheese atop your delectable dish. now, dig in, enjoy, and try not to guilt yourself for eating so many carbs. what, that’s just me? sunday night bolognese

*some recipes call for no canned tomatoes, just tomato paste. if you omit the canned tomatoes, you’ll end up with a less sauce-y sauce – more meat with a little bit of tomato. i like my meat sauces pretty sauce-y, so i always throw in the extra canned tomatoes (you could use fresh too!)

gingerbread muffinsLOOK! i still bake things and blog things! i once read this list of things bloggers should never, ever do, and #1 said, “don’t apologize for your absence, people get annoyed when you’re all, omg i’ve been gone for so long, i’m so sorry dear readers. but i don’t have very many dear readers, and WHATEVA, I DO WHAT I WANT, so, here’s my apology: life got away from me. dear god, it’s me, sarah, and it has been over 2 months since my last real blog post. i am here to confess my sins.

i really am hoping to talk to you guys, my faraway + internet friends, about what i’ve been doing the past few months, but that’s a story (or stories) for another post (posts).

we are gathered here today to talk about the deliciousness that is these gingerbread muffins. i adapted them from how sweet eats’ recipe (love her, want to be her), and by adapted i mean i didn’t have enough maple syrup, i was too lazy to walk the 2 blocks to the grocery store and i didn’t want to use the aunt jemima (ew) from the bodega across the street, so i used honey instead.

anywho, this recipe calls for LOTS of molasses, and i love anything with molasses. i always try to lick it out of the jar (TMI?), only to realize that while molasses makes other things taste GREAT, molasses itself tastes, well, bitter and gross and oh my god why did i put that in my mouth?!

i have the same issue with vanilla extract.

i made these muffins on sunday morning, and then i took a pretty picture of them on a pretty tea towel and marveled at my artistry and how perfectly baked they were. then i ate one on the way to soulcycle and resisted the urge to instagram my artistry, knowing that this here recipe would be a good one for the blog.

so here we are, folks. gingerbread muffins! OH MY HOLIDAY!

what you’ll need:

2 cups all-purpose flour
2 teaspoons ground ginger
1 teaspoon baking powder
1 teaspoon cinnamon
1/4 teaspoon nutmeg (use fresh if you have it, i didn’t)
1/4 teaspoon salt
1/8 teaspoon ground cloves
2/3 cup loosely packed brown sugar
1 large egg
1/2 cup molasses
1/3 cup maple syrup (substitute honey if you don’t have enough – that’s what i did)
2 teaspoons vanilla extract
1/2 cup unsalted butter, melted
2/3 cup milk
raw sugar for topping (i used THIS amazing vanilla bean sugar that in nashville last month and it is the BOMB DIGGITY. if you like to bake, ORDER IT)

what you’ll do:

preheat your oven to 350 degrees F. line your muffin tin with liners (pretty ones make all the difference).

whisk together your dry ingredients in a small bowl: flour, ginger, baking powder, cinnamon, nutmeg, salt, and cloves. set aside.

in a larger bowl (i used my kitchenaid mixer, also known as my BBF, my best baking friend), whisk together brown sugar and egg. once those are hanging out, getting to know one another, whisk in the molasses, maple syrup (or honey if that’s the path you chose) and vanilla extract. then, whisk in your melted butter until all is fully combined and right with the world.

stir in your dry ingredients until JUST combined. no overzealous mixing, please.

before they’re fully combined, stir in the milk. now you should have a smooth batter.

fill your muffin cups 3/4 of the way full, and top each with a big sprinkle of sugar. bake for approximately 20 minutes, or until your muffin tops are set. no one likes a jiggly muffin top.

(sorry, couldn’t resist).

now, eat, celebrate, share with friends, bring to your office, etc. most of all, ENJOY!

wild rice and peach saladthere comes a time each summer, when i’ve eaten one too many ice cream cones and had one too many drinks and i just start to feel like a giant blob of unhealthy. such was the case during the week leading up to labor day, when i told myself, after a weekend of somewhat-controlled debauchery on the jersey shore, that i was going to “eat clean” for a week.

that didn’t last. i mean, i tried, really, i did. and i definitely ate healthier, but if there’s one thing i learned about myself, it’s that putting restrictions like “eat clean all week” on myself just make me want pasta even more. whereas, when i just tell myself i’m actively going to try and eat healthily, and swap my ice cream cones for berries, i’m somewhat able to do so.

anyway, during my “eat clean” week, i stumbled across this recipe from the QUEEN of eating clean. seriously, this woman is perfectly happy to eat a giant bowl of vegetables for dinner and call it a day. i mean, i wish i was that sort of human, but i’m just not.

i adapated sarah’s recipe to fit my own tastes, and to make it work-lunch worthy, i served it over arugula, which beefed it up a little (and added some greens, which are always healthy, right?!). it’s delicious. trust me, you want to make this.

what you’ll need:

  • 1 1/2 cups wild rice mix
  • 1-2 ripe peaches, sliced
  • 1/3 cup mint, chopped (plus more for garnish)
  • 1 small shallot, minced
  • 1 clove of garlic, minced
  • juice of one large orange
  • 2 tablespoons Extra Virgin Olive Oil
  • 1 tablespoon red wine vinegar
  • pink himalayan salt or sea salt

what you’ll do

  • cook rice according to package directions. generally speaking, rice is a 2:1 water to rice ratio, with a bit of butter or oil thrown in.
  • stick your rice in the fridge to cool. meanwhile, mince your garlic and shallot, and juice your orange.
  • mix the shallot, garlic, OJ, EVOO, red wine vinegar and a little bit of salt (i used sea salt) into the bowl. stick your fork in and taste it. add more salt (or a little pepper, i did) if you’d like.
  • slice your peaches and roughly chop your mint.
  • in a large bowl, combine rice, peaches, and mint. add dressing and mix well, then stick in the fridge for at least 30 minutes to let the flavors really seep in. i left mine in there overnight, since i was bringing it to work the next day.
  • when you’re ready to serve, fill a plate with a hearty serving of arugula (spinach or mixed greens would also work nicely here), and top with rice salad. sprinkle with some fresh mint and a little bit of salt and pepper, then toss to combine.

et voila! a healthy, pretty salad that will make everyone else at the office jealous.


vanilla almond granola with cranberriesoh, granola. granola is one of those foods that makes you think of earthy crunchy healthy people who probably eat paleo and go to yoga at least 4 times a week. i mean, there’s a reason people can be referred to as “granola” people. or, wait. did i just make that up? regardless, you know the sorts of people i mean, don’t you? the folks who wouldn’t dare each a bowl of lucky charms (aka, not me).

anyway, people love granola. i’d go as far as to say that granola is really in right now. top it with berries, eat it with yogurt, eat it with milk, snack on it…no matter how you’re consuming, granola is having a moment. or rather, it has been having a moment for the past few years. i too jumped on the yogurt and granola train a year or so back, eating it regularly for breakfast at my desk. but recently, i happened to take a look at the ingredient breakdown on the back of my supposedly healthy granola, and guess what? that ish was FULL of sugar. and other ingredients i couldn’t pronounce. and that mystified me, because granola is basically just oats and nuts and maybe some oil/sweetener, right? and dried fruit if you’re feeling fancy? so what was up with ingredients i couldn’t pronounce?

NOT COOL, GRANOLA.

so recently on a weekend, when i was sitting at home being lame while others were out having fun and doing the things that so-called normal late twenty-somethings do, i made my own. after doing a bit of googling, it turned out i was right: granola is basically just oats + sweetener + nuts + a lil bit of oil + spices + dried fruit/chocolate. EASY PEASY.

i decided i wanted vanilla granola with dried cranberries and toasted almonds (i’d picked up the latter two ingredients at whole foods recently and needed to use them for something). so i tossed some oats into a bowl with the almonds, then melted down some coconut oil, and mixed it into the oats along with some vanilla extract, some maple sugar for sweetness, and some cinnamon for shits and giggles. and guess what? the results were DELISH.

let’s break it down, shall we?*

*here’s the thing about granola: so long as you coat your oats and add some sweetener, you’re pretty much guaranteed goodness. so don’t worry too much about measuring cups.

VANILLA ALMOND GRANOLA WITH DRIED CRANBERRIES

what you’ll need:

– approximately 2.5 -3 cups of oats

– pinch of salt

– 1/4 cup maple syrup

– 1/2 cup melted coconut oil

– 1 tablespoon vanilla extract (pour liberally, folks)

– 1 teaspoon ground cinnamon

– 1/2 cup dried cranberries

what you’ll do:

preheat your oven to 300, and line two baking sheets with parchment paper (or a silicon baking mat, if you’ve got one).

melt down your coconut oil, and pour it over your oats. toss to mix. add your maple syrup, vanilla extract, and cinnamon, and toss a bit more. toss in your almonds.

go ahead and do a little taste test if you want. ain’t no raw eggs in here. add some more sweetener, vanilla, cinnamon, etc, if you’d like.

once your granola has passed the taste test, spread them out on the baking sheets you’ve prepared. don’t overload your sheets – a thin layer is what’s going to ensure your granola is cooked evenly.

bake for about 45 minutes, tossing every 15. when done, let your granola cool completely. the air will help to create that crunchiness that granola is known for.

once cool, toss with your dried cranberries – or any dried fruit, really! or even chocolate chips if you’re feeling really crazy – and store in an airtight container. granola should stay fresh for about 3 weeks at room temperature.

HAPPY EATING! i like to eat mine with fresh fruit on top and honey greek yogurt on the bottom, as evidenced here.


magnoliaredvelvetcupcakesif you asked me to pick a dessert i couldn’t live without, it would be cookies. cakes i could throw by the wayside, i love ice cream but could 100% live without it, and brownies, well – love them, but overall, they rate MEH in my book. but cookies, i can’t live without. that is, until i think of cupcakes. see, cupcakes are the best of both worlds: batter AND frosting. there’s something about a perfect cupcake, the combination of fluffy cake and light, airy icing, that just makes for magic inside the mouth.

such is certainly the case with these red velvet cupcakes. they’re from allysa torey’s more from magnolia book, which i “borrowed” from my friend katie two years ago and never returned. torey’s red velvet recipe is my favorite, and though she generally serves hers with vanilla buttercream, i opted to go more traditional, and topped my cupcakes with cream cheese frosting, because, well, cream cheese and red velvet go together like peanut butter and jelly.

for the cupcakes, here’s what you’ll need:

  • 3 1/2 cups cake flour (not self-rising, that’s different! i buy swan’s down, it comes in a happy red box)
  • 3/4 cup (1 1/2 sticks) unsalted butter, softened
  • 2 cups white sugar
  • 3 large eggs, at room temperature
  • 6 tablespoons red food coloring (or, if you opt for gel, simply squirt ’til the dough is bright red – that’s how i roll)
  • 3 tablespoons unsweetened cocoa
  • 1 1/2 teaspoons vanilla extract
  • 1 1/2 teaspoons salt
  • 1 1/2 cups buttermilk
  • 1 1/2 teaspoons cider vinegar
  • 1 1/2 teaspoons baking soda

here’s what you’ll do: 

first things first. preheat your oven to 350, and prep your muffin tins. i like to use foil wrappers, but you could use pretty paper ones if your heart desires.

in a small bowl, sift your cake flour and set aside. {sidenote: i never sift anything. i don’t even own a sifter. but you should do this, because it’s what allysa torey does} next, combine the butter and sugar in a large stand mixer (or large bowl, if you don’t have a kitchenaid) until light and fluffy. that should be approximately 3-5 minutes on medium. add your eggs, one at a time, and beat in.

in an even smaller bowl than your small bowl, whisk (literally, use a whisk) together your red food coloring, cocoa powder, and vanilla. {sidenote: if you’re using gel food coloring, like i do, this won’t mix as nicely as you’d like since there’s less liquid in gel than there is in, well, liquid. feel free to add a tiny bit of water to move things along}

add your red chocolate mixture to the batter, and beat well. at this time, you can add more food coloring to your batter if it’s not red enough. gel’s a bit hard to measure, so you basically just need to keep adding color until you’ve got the shade of your dreams.

pour your buttermilk into a measuring cup, and stir the salt into it. add your buttermilk in three parts, alternating with the flour. every time you add something, beat until incorporated, but don’t over-beat!

now, for the fun, science-experiment part of the day. in yet another small bowl, stir together your cider vinegar and baking soda. watch as it fizzes up, just like those “volcanoes” you made in 6th grade. WHEEE! what fun, right?

using a rubber spatula, scrape down your batter into the bowl, and ensure that all ingredients have been evenly mixed in. you’ll often find a bit of stubborn, unmixed butter at the bottom of the bowl, so be sure to check for that.

fill your muffin cups 2/3s of the way full. bake for approximately 20-30 minutes (it really depends on your oven, but keep an eye on your ‘cakes after 20), until a toothpick inserted in the middle of a cupcake comes out clean.

when they’re done, let the cupcakes cool in their tins for about 5 or so minutes, then remove and place on a cooling rack and let ’em chill. go watch an episode of SVU, or house hunters.

then come back and make your frosting.

what you’ll need:

  • 2 8oz packages of cream cheese at room temperature
  • 1 teaspoon vanilla extract
  • 1/2 stick of butter at room temperature
  • 1.5 cups of powdered sugar

what you’ll do:

basically, you’re just mixing all that goodness up in your kitchenaid. start with the cream cheese and the butter, add the vanilla, and then the sugar. beat until smooth. i usually beat mine at least 5 minutes, so that’s saying something. also, feel free to add more confectioner’s sugar if the frosting seems too watery. powdered sugar basically evaporates into the universe when you mix it into anything, so you really can never have too much of the stuff. i’ve added an entire box at times (SUGAR HIGH). just keep your eyes peeled, essentially, and don’t be afraid to taste test for consistency’s sake.

once your cupcakes are cooled, spread your frosting onto those babies, swirl your spoon around the top to make that little “magnolia dent” the bakery is so famous for, and eat! or dole out to coworkers, as i do. or, if you’re a person with a big heart and a big sweet tooth, do both (okay, that’s what i do).


strawberryscones2

i read this post the other day, about the pervasiveness of the boring blog, which got me thinking about whether my little corner of the internet has any real worth, about whether anything i’m doing is original. here’s where i landed: very few things are truly original these days. what is original about something – be it a recipe, or a moodboard, or a story – is that its yours. that it’s told in your own voice, which is a voice no one but you can convey.

take, for example, the above recipe for strawberry scones. i riffed off this one, from annie’s eats. for all intents and purposes, it’s annie’s recipe, not mine. but when i made it, i added vanilla. i squeezed a bit of extra lemon juice into my batter instead of just adding zest. i used my hands to cut my butter into the flour mixture, instead of putting it into the food processor (a tip my mother taught me long ago). do those few things make it “mine enough” to warrant a post? i suppose that’s up for debate.

what i do know is that i made this recipe, and made it my own. and it was delicious, so i’d like to share it with you. it’s as simple as that.

so, let’s do this, shall we?

scones are one of those foods that people seem to imagine are difficult to make (i put risotto into this category as well). in fact, when i made these on saturday, the first thing my roommate said was, “scones? aren’t those really hard to make?”

guess what? they’re not. scones are actually uber SIMPLE to make. which is what makes them so magical. they’re a breakfast/brunch standby, and you can whip them up in under 30 minutes. generally speaking, it’s likely that you already have all the ingredients you need on hand, which is always nice. these ones, which are spiced with a hint of lemon zest and feature fresh strawberries, are like a pop of spring in your mouth, which is a good thing on a sunny day when it feels like mother nature is finally letting go of her grasp on the warmer weather we were promised almost a month ago.

what you’ll need:

1 large egg

¼ cup greek yogurt, plain (i used chobani)

½ cup milk

1 tsp. of vanilla extract

1 tsp. lemon zest + the juice of 1/2 of your zested lemon

2¼ cups all-purpose flour

¼ cup sugar, plus more for sprinkling

1 tbsp. baking powder

½ tsp. salt

8 tbsp. cold unsalted butter, cut into small pieces

1 heaping cup diced fresh strawberries

strawberryscones1

what you’ll do:

preheat your oven to 425.

in a small bowl, whisk together your yogurt, milk, vanilla extract, lemon zest, and lemon juice.

in a larger bowl, mix your dry ingredients. set aside, and cut up your butter. i like to cut mine into sliced (the way you’d slice up cheese), then quarter those slices.

add your butter to dry ingredients. with clean, dry hands, begin to smush the little bits of butter into the flour. you can use a pastry cutter, or a food processor, or even two forks, to do this, but i find using your hands is a) most effective and b) most relaxing.

{the warmth of your hands helps to melt the butter ever so slightly, and there’s something incredibly calming about running the mixture through your fingers, smoothing the lumps and turning the ingredients into a crumbly bowl of goodness. my favorite thing about baking is how tactile it is, whether you’re measuring flour or kneading dough. whenever you can, choose to do things with your own hands, instead of letting a machine do them. it’s worth it, i promise.}

once the butter has been mixed into the flour (it should resemble pea-sized crumbs), toss your strawberries into the mixture. {this is an important step! coating the berry bits with flour ensures that they won’t get too mushy.}

once you’ve folded in your strawberries, add the wet ingredients to the dry, and mix lightly with a spatula or wooden spoon, until all the wet has been incorporated into the dry. {don’t stir vigorously, you’re not trying to mix concrete here. over-mixing your batter is the biggest mistake you can make in baking. big mistake. HUGE.}

transfer your dough to a well-floured surface (i like to use these cutting board mats), and pat it down to flatten a bit. if you’d like, you can shape your dough into a circle, and cut into wedges. i got these cute biscuit cutters at the williams sonoma outlet last year, so i always opt to put some nice fluting details on my scones when i can. what can i say? i’m fancy like that. anywho, you can basically shape your scones however you damn please, so long as you make them all somewhat equal to ensure even cooking.

to bake, place your scones on a baking sheet lined with parchment paper (or silpat, if that’s your jam) for 13-15 minutes. they should be golden around the edges, and have risen considerably. when your kitchen starts to smell like fruity spring goodness, they’re done.

eat ’em as soon as you can, because sadly, the strawberries get a bit mushy after a day or so. eaten hot out of the oven, with a pat of butter, these are positively stuff your face delicious. happy eating!

*i packaged most of mine up and dropped them off to my ladies at blackstones – my favorite hair salon in the city – as a thank you for prettifying me and giving me some serious blonde ambition the night before.

Image

sometimes i think about how skinny i’d be if i didn’t eat carbs, or really, pasta in particular. i love rice, but i could give it up. i’d miss bagels, but i could do without them. i could care less about traditional bread; i’m not a sandwich girl. but pasta. pasta i could not live without. those paleo folks who shred zucchini and call it pasta? kudos to them, but i ain’t buying that shit. pasta is pasta, and i’m not going to cut up some veggies and call it a carb. hells to the N-O. i eat more pasta than i should, that’s for sure – so when i do eat it, i try to make sure it’s relatively healthy, and not doused in some disgustingly fattening sauce (alfredo, i’m looking at you). i always toss my pasta with a) homemade pesto b) homemade meat sauce or c) fresh veggies and herbs. the canned stuff makes a rare occurrence when i’m feeling uber lazy, but i do my best to ensure that if the pasta is boxed, whatever goes on top of it is fresh.

such is the case with this easy-as-pie recipe, for lemon parsley spaghetti with garlic and parm. when i made it the other day, i was craving greens, so i tossed some broccoli in as well. all you need are lemons, garlic, butter, italian flat leaf parsley, olive oil, parmesan, and spaghetti. that’s IT. and trust, this stuff is good. you could whip it up for a dinner party and impress your guests.

what you’ll need:

  • 3/4 lb spaghetti (you could sub linguine or any other thin pasta here)
  • 4-5 garlic cloves, minced
  • 1/4 cup olive oil ( i use trader joe’s)
  • 2 tablespoons unsalted butter
  • 1/2 cup fresh Italian parsley, chopped (make sure you don’t get the curly kind! italian parsley is flat leaf)
  • 2 tablespoons lemon zest, grated
  • 1/4 cup fresh lemon juice
  • salt + pepper
  • parmesan cheese

what you’ll do:

boil water for your spaghetti. while it boils, slice and dice all your goodies. grate the parm, chop the parsley, dice the garlic, zest your lemons, and squeeze ’em of their juices.

once your water is boiling, toss in your spaghetti with a pinch of salt. while the pasta cooks, throw your butter and olive oil into a skillet, and let the butter melt. turn the heat down to medium, and throw in your garlic. saute for a few minutes, until your entire kitchen smells like garlicky goodness (the best smell on earth). when garlic browns, turn off the heat.

drain your pasta, and toss is with the garlic/olive oil mixture. next, mix in your lemon zest/lemon juice/parsley. top with parm, season with a bit of salt and pepper, et voila! a delicious, easy, springy and oh-so-pretty meal!

ps: if you wanted to add protein, some lemony shrimp would be perfection on top of this dish.

pps: if you wanted to add veggies, simply chop them up and throw them into the pasta water for the last few minutes to cook them up, then drain them with your spaghetti.

image

you guys, i made this for dinner the other night (as documented on instagram above), and it was so spectacularly easy that i forgot to take pictures of my progress. essentially, i have a before picture, and an after picture, and that’s about it. but that’s okay, because as i said, it’s pretty much the easiest recipe EVER, so there’s not that much to document. i found the recipe here, and adapted it a bit to suit my kitchen needs.

Ingredients

  • 1 lb rigatoni pasta
  • 1 tsp kosher salt
  • 1 TB olive oil
  • 2 cups spaghetti sauce (i used trader joe’s)
  • 1/2 cup grated parmesan cheese
  • 1/2 cup heavy cream
  • 2 ounces mozzarella ( i got mine at trader joe’s)
  • 1 cup grape tomatoes
  • 3-5 fresh basil leaves
  • 1 pre-cooked chicken breast (i had some breaded chicken left over that i chopped up)

Instructions

  1. Pre-heat oven to 350 degrees.
  2. Cook pasta according to package in a large pot of water with salt. Once pasta is fully cooked, drain and drizzle with olive oil.
  3. In a large pan warm spaghetti sauce over medium heat. One the sauce is heated, add in heavy cream and parmesan cheese. Simmer for 2-3 minutes. Once cheese is melted pour sauce over noodles.
  4. Cut grape tomatoes in half and mozzarella in 1/2 inch cubes. Then combine the mozzarella (save about 1/4 cup) and tomatoes with the pasta. Add your chopped up chicken (shrimp would also be yummy!) Pour into a 9×9 baking dish. Top with remaining cheese.
  5. Bake for 20-30 minutes, or until golden brown.
  6. Top with fresh basil. Enjoy!