 buffer | cuticle oil | moisturizer | base coat | polish | top coat
so, i have a confession to make: i got sort of addicted to gel nail polish this summer. i know, i know. it’s terrible for your nails, and it’s so much more expensive, but there is just something positively crack-like about staring at shiny nails that DO NOT CHIP. FOR WEEKS. i mean, hello amazing. gel is simply easier when it comes to maintenance, and it’s especially good for summer, when too many days at the beach can wreck havoc on your mani/pedi.
that might be the most superficial sentence i’ve ever written. alas.
anywho, now that summer’s on its way out the door (don’t let the door hit you on your humid ass on the way out, summa! just kidding, i love you), i’m re-dedicating myself to the practice of DIY manicures, and kicking my gel habit to the curb. over the years, i’ve pretty much perfected the art of the at-home manicure, so i thought i’d share the wealth. people often ask me how i get such nice manicures with just my own two hands, and the answer is much like other things: practice, practice, practice. and then practice some more.
i think my hands have gotten considerably less shaky over the years, but i still make a bit more of a mess when i’m painting with my left hand – but hey, that’s why god made q-tips, right? above are my 6 steps to a perfect manicure, any time. but since it’s fall, we’ll go with fall manicure, yeah? i’m crushing on that butter london shade above. god i love me some glitter.
1) cut, buff and file. the perfect manicure starts with fresh, clean nails. i prefer short and square shaped, but you can go long and rounded if that’s your thing. just don’t let them get too long, you’ll look like you have crack nails, ya hear? i trim with a nail clipper, file straight across to get them even, and then buff the heck out of them with the little doo-hickey above.
2) clean cuticles and apply oil. at my nail place, they always attempt to cut my cuticles with a scary looking tool, but i try to simply “push” and clean instead. cutting leads to hangnails, in my humble opinion, so i simply clean things up and then massage some oil into my cuticles. trust me, oil helps. one of my good friends carries a little bottle of cuticle oil in her bag at all times, and massages it in at random. i can’t commit to that, but i try to lube ’em up when i can (gross?).
3) moisturize. dry hands are not cute. i should know, my hands and feet are always dry. my feet, to the point where the girls at the nail salon yell at me (WHY YOU SO DRY?! girl, i don’t know! in the words of gaga, i was born this way!). my hands are a bit better, but i try to moisturize as often as i can, especially in the winter, when cracked skin gets the best of me. the aesop lotion above is a splurge, but it’s amazing, trust me.
4) apply a base coat. i’ll admit, sometimes i’m feeling lazy, and i skip this step. but i notice that when i remember to apply base coat, my manicure lasts longer, plain and simple.
5) apply polish of your choice. i’m a big fan of glitter pretty much any time, anywhere, but a shade like the one above, with a subtle shimmer, is a bit more work-appropriate. come fall, i lean toward deep oxblood shades and moody greens. on days when i’m feeling more casual, i go with a bronze/rose gold ish shade like the one above, always with some shimmer.
6) apply top coat. i SWEAR by this top coat. there are more expensive versions out there, but i’ve tried a bunch and i always come back to my beloved out the door, which truly does have you out the door much sooner than pretty much any other option. quick dry for the win, am i right?
and there you have it: 6 simple steps to getting that perfect fall manicure. you and your beautiful nails can thank me later.
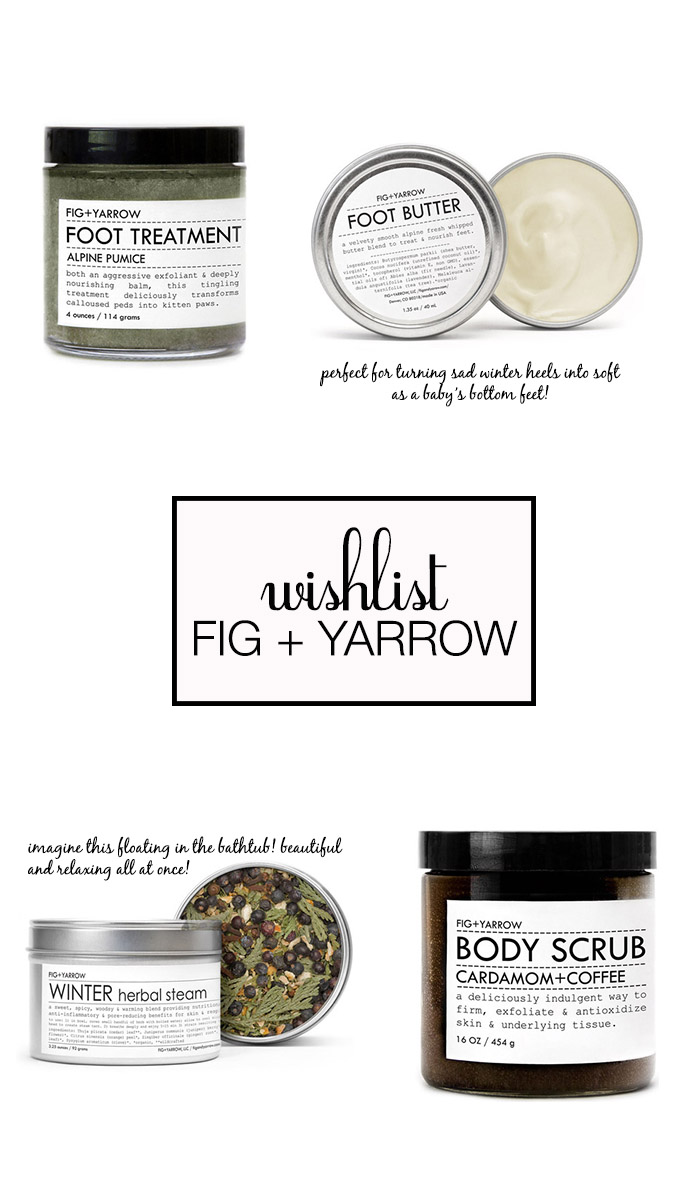 i have a confession to make: i have ugly heels. like, gross, cracked, totally fugly please get those away from me heels. if i had a dime for every time a nail salon attendee has said, “WHY IS YOUR SKIN SO DRY?!” i’d be a millionaire at age 28.


